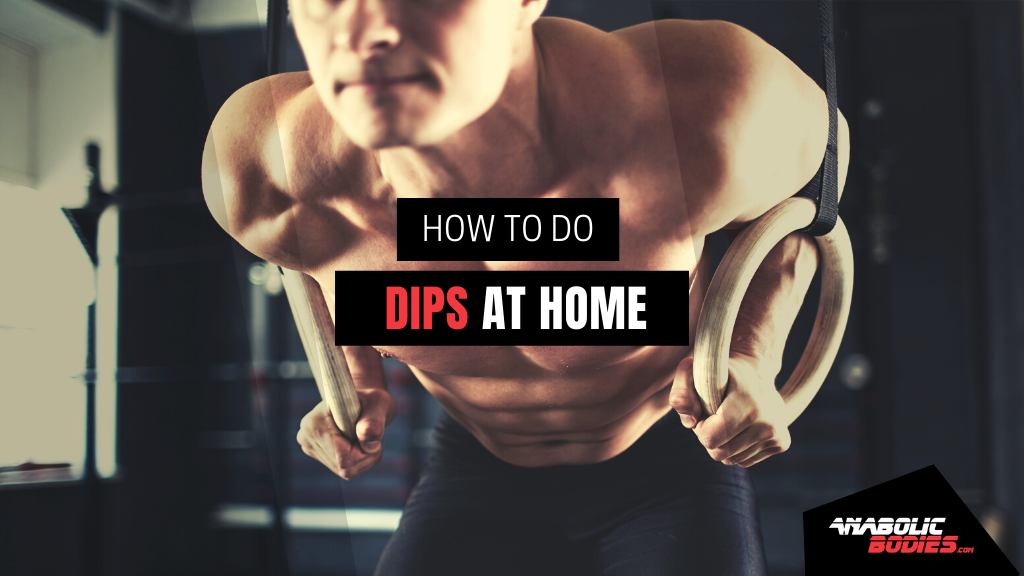
9 Creative Ways To Do Chest And Tricep Dips At Home
The dip station at the gym is crowded and you’ve started to think about how to do dips at home…
Look, we completely understand - waiting in the never-ending line of bros smashing out heavy dips is not only time consuming but it is also somewhat pointless.
Learning how to do dips at home is easy, safe, and can be a great way to make your daily routine in the house more fun and interactive.
In this article, we are going to walk you through 9 creative ways you can do chest and triceps dips at home.
We’ve also included exercise progressions so that you can improve your overall strength and avoid nagging injuries.
Why Should You Do Chest and Triceps Dips at Home?
Putting aside the obvious statement that working out is fun - doing chest and triceps dips at home can be a great way to lock in your movement patterns without waiting for the parallel bars at the gym.
Here are 3 important reasons why you should do chest and triceps dips at home:
1. There Are Plenty of Progressions
The great thing about bodyweight exercises is that there are a variety of progressions you can make the most of to get stronger and leaner.
2. Training at Home is Cheaper
No need for an expensive gym membership or fancy workout equipment. In this article, we will show you 9 cheap, effective, and creative methods on how to do dips at home.
3. Dips Are The Bench Press of Bodyweight Chest Exercises
When you go to the gym to train your chest the first thing you think of is the bench press.
In bodyweight training - the first exercise on your radar for building the chest should be dips - followed very closely by pushups.
Starting to think that performing chest and triceps dips at home might be fun and supplemental to your workout routine?
Let’s answer the most common questions surrounding how to do dips at home: What is the Difference Between Chest and Triceps Dips?
What is the Difference Between Chest and Triceps Dips?
There are two main styles of performing a dip exercise. Both exercises will hit the same muscles, but the specific movement pattern will target the main muscles a little differently.
The Chest Dip
The chest dip is an exercise that hits mainly the pectoralis major and uses the triceps, anterior deltoid, and other structural muscles as synergistic muscles.
Synergistic means they assist in the movement.
Here is a video showing what the chest dip looks like.
Notice is the forward lean of the upper body?
https://www.youtube.com/watch?v=2z8JmcrW-As
You should notice that the athlete is almost falling forward while they perform the chest dip.
This forces the chest to work harder than other muscles and creates the famous chest dip.
The Triceps Dip
The triceps are a series of muscles on the posterior side of the upper arm - famously named the triceps because they have three heads.
They are responsible for extension at the elbow.
To perform extension at the elbow and target the triceps during a dip athlete should maintain a relatively upright position - with very little forward lean.
This will help to put more resistance on triceps extension and target the triceps.
Here is a video showing the difference between a chest and triceps dip.
https://www.youtube.com/watch?v=sM6XUdt1rm4
Note: Triceps dips can also be performed as an isolation exercise.
In this video, you will see that the bodyweight resistance has been changed, and the athlete positions their feet on the ground. In this position, you perform dips solely through triceps extension.
https://www.youtube.com/watch?v=6kALZikXxLc
Although this exercise does not have as much resistance, research shows that isolation exercises like this help to stimulate muscle hypertrophy - or the increase in muscle size.
Both isolation triceps dips and upright triceps dips should be included in your program to grow stronger.
For a FREE At-Home Dip workout be sure to keep reading.
Okay - enough dilly dally, let’s get into the meat of this post.
Want to learn how to do dips at home? Check out the next section for strength progressions and example exercises.
5 Ways to do Triceps Dips at Home
Completing triceps dips at home can be a great way to add some fun into your day, include new exercises into your morning routine, or add supplemental strength to your existing weight training program.
Note: These exercises are ordered from beginner (1,2), intermediate (3), and advanced (4,5).
Beginners should start with the first progression and move into more difficult exercises as they hit the strength markers described in each exercise.
Check out these three creative exercises you can use to train triceps dips at home:
1. Chair Dips (Feet on Ground)
https://giphy.com/gifs/xTiTnDsm4QIWVlBlO8
In our first exercise progression for tricep dips, you will be using a traditional chair from your kitchen or living room.
The setup here is simple - put your hands in the same place where you would have put your butt if you were sitting and your feet should be stationary on the ground. Then move your body forward so that your torso and hips are hanging in front of the chair.
Try to keep your reps and sets simple to start. Use 12 reps by 3 sets with about 90 seconds of rest between sets.
Strength Marker: When you can perform 20 reps of this exercise in a row you can move on to the second progression.
2. Travelling Stair Dips
https://www.youtube.com/watch?v=sMBNgZLGLhs
Stationary movements can become somewhat boring and repetitive.
If you have a staircase in your house travelling stair dips can be a great way to add some fun into your dip program.
Here you start at the top of your staircase with your feet about 3-4 steps down from your hands in a tricep dip position.
Complete a dip as shown in the video and move your hands and feet down one stair.
Complete this series until you have completed a dip repetition on each step.
Not only is this a great alternative to traditional tricep dips, but it is also a great way to activate the core!
3. Feet Elevated Triceps Dips
https://www.youtube.com/watch?v=0HIoN1k2hcc
The second progression you can use home is very simple.
Elevating your feet will increase the resistance on the muscle by putting more of your body weight on the triceps.
Assume the same position as exercise (1) but find an object 2-3 ft high (or about the same height as the chair) and place your feet on it.
Since this exercise puts more resistance on the muscle you may want to start your reps at a lower frequency.
Our suggestion would be to start with 6-8 reps by 3-4 sets.
Strength Marker: When you can perform 15 feet elevated triceps dips in a row you can move onto the third exercise progression for triceps dips at home.
4. Upright Triceps Dips
https://www.youtube.com/watch?v=wjUmnZH528Y
The last and most challenging triceps dips are the upright versions.
Two standard kitchen chairs, garage saw horses, or tall clothes dressers can be used as parallel bars. Be sure they are strong and stable.
In this version your feet are off the ground, putting your entire body weight on the triceps.
Beginners trying this exercise should try completing the negative of the movement before completing a full range of motion.
For information on negatives (and their advantage in Tempo Training) check out the section: how to improve chest dips at home.
Strength Tip: Try using cluster sets or supersets to improve strength and variability in your workout program.
BONUS: Sphinx Push Up
https://www.youtube.com/watch?v=wJfn8qOjdJ0
The Sphinx Push up is a variation on a traditional pushup that specifically targets the triceps by only allowing you to move through triceps extension.
In this exercise you will position your arms close to the upper body (like a military push up) and press through your elbow.
You should make sure your elbow is directly beneath the shoulders.
If you want to make this exercise more difficult move your arms further away from your body.
Beginners should start with 6-8 reps by 3-4 sets.
4 Ways to do Chest Dips at Home
Chest dips are the glory of all pushing movements in bodyweight exercises.
Unless you are at the level of handstand pushups, completing chest dips are the best way to put on strength and mass in your workout program.
Note: These exercises are ordered from beginner (1), intermediate (2,3), and advanced (4).
Beginners should start with the first progression and move into more difficult exercises as they hit the strength markers described in each exercise.
Here is a list of the 4 most creative ways you can perform chest dips at home:
1. Dip Negatives Using 2 Chairs
https://www.youtube.com/watch?v=fRoxbH4fnGY
The first way to complete dips is to use only the negative portion of the movement.
Exercises are broken down into multiple phases but the lengthening (or in this case, lowering) of the muscle is called the eccentric phase or negative.
Simply put - start at the tip of your dip and lower your body to your end-range of motion. Do not push back up. Instead, put your feet on the ground and stand-up.
Complete this series 4-6 times with 2 minutes rest between sets.
Strength Marker: When you can complete 8-10 negatives with clean form (no cheating) and slow movement speed (2-3 seconds down) you are ready to move into the second progression.
2. Band-Assisted Chest Dips Using 2 Chairs
https://www.youtube.com/watch?v=IOlHTsmfr68
Our second progression requires you to have some form of a resistance band. This can be anything from a pair of spandex pants to an actual resistance band.
As long as it has some stretch it can help you with the movement.
Complete a traditional chest dip with a slight forward lean and slow movement speed. Try to complete 4-6 reps by 3 sets.
Strength Marker: When you can complete 8-10 band-assisted triceps dips in one set you are ready to move into the next exercise progression.
3. Chest Dips on Kitchen Counter
https://www.youtube.com/watch?v=y4mCllu5Qps
In our third progression, there is no need for band assists or strict negatives.
Instead, keep your rep speed slow and perform chest dips with a slight forward lean.
You will find it most comfortable if you can find a corner of your counter.
Place your hands on either side of the corners and lift your feet off the ground.
Start by using 4-6 reps by 3 sets and move into more difficult sets by increasing the number of reps per set or by slowing down your movement speed - as we explain in our Tempo Article.
Strength Marker: When you can perform 8-12 chest dips on your kitchen counter you are ready for the most difficult variation of the at-home chest dip.
4. Chest Dip ¼ Reps
https://www.youtube.com/watch?v=QsHSH0M1eKg
You will want a structure that is as stable as possible for this exercise.
We recommend either using your kitchen counter (like exercise 3) or using a sawhorse from your garage.
Note: If you have matching dressers in your bedroom these can also function as very stable dip stations as the weight of the clothes keep them planted on the ground.
¼ reps mean you are completing 1 and ¼ reps for every true repetition.
Confused? Watch this video to understand what ¼ dips look like.
These are an advanced exercise progression that specifically targets the chest muscles.
Be sure you have conquered all of the previous strength markers before you add this to your strength program.
Use a simple rep scheme of 4 reps by 3 sets with long rest between sets.
To avoid injury be sure you have very high-quality reps during this exercise.
Now that you have a list of chest and tricep dips for home workouts let us walk you through how you can take your strength to the next level.
How to Improve Strength at Home
Improving strength at the gym is easy - add more weight or complete more reps.
Sometimes when you are training at home you don’t have this luxury of simply picking up a heavier dumbbell, or loading another plate onto the barbell.
Here are 4 methods you can improve your strength at home:
Method #1: Use Negative Dips
Dips are not just a great exercise progression - not are they something you should just throw away when you have progressed past them.
Dip negatives should be included in your workout plan indefinitely and are valuable for all skill levels.
Use dip negatives as a way to add variability to your program and as a way to superset another exercise.
Method #2: Use Weighted Dips Belts for Progressions
Adding extra resistance to your existing body weight is a great way to increase muscle stimulation during an exercise.
Start off light and understand that with a weight vest you should lower your total reps to favor strength development, not muscular endurance.
Example: if you can complete 8 standard bodyweight chest dips and put on a weight vest - attempt 3-4 sets of 4 reps (½ of your bodyweight max).
Method #3: Use Accessory Exercises
Accessory exercises are any exercises that add value to your dip program.
Deep chest pushups, rotator cuff exercises like internal and external rotation, and mobility drills are great ways to add accessory strength to your existing dip program.
Method #4: Roll and Release Your Muscles
A tight chest leads to a tight shoulder and neck - which ruins your posture.
Rolling (using a foam roller or lacrosse ball) is a great way to massage the muscle and allow it to release its tension on the muscle increasing range of motion and limiting injury.
Do yourself a favor and grab a roller and/or lacrosse ball and spend 10 minutes every morning rolling out tight muscles.
Not only is this a great way to add movement into your morning routine but it will help you grow stronger by increasing your range of motion and limiting injury.
Are dips for everyone?
No.
There are some people who should limit their dip numbers and favor other exercises - here’s why.
Who Shouldn’t Do Dips and Why
There are various reasons why you may want to limit your dip progressions and overall dip program.
Here are some of the downsides to dips and why some people should avoid them:
Existing Shoulder Injuries Can Flare Up
Those who have rotator cuff injuries, weak shoulders, or just bad posture can create trauma to the shoulder joint.
Be sure to start slow and track any nagging injury that starts to flare up.
Dips Force a Compromised Position
Dip-style exercises force the shoulder joint into a compromised position that can lead to shoulder impingement, and most commonly anterior humeral glide.
Here is a video explaining how you can perform perfect dip form so that you avoid nagging injuries like shoulder impingement or anterior humeral glide.
Those New to Workout Programs Are Not Stable Enough
Stability refers to your strength in one position. Most people who workout only focus on the strength of a movement and not the stability that is required.
Those who are trying to grow stronger should spend time in exercises like planks, one arm planks, scapular retractions and other stability moves to increase stability along with their strength progressions.
Key Takeaways + FREE At-Home Dip Workout
Thinking of starting an at-home dip workout program? We’ve got you covered.
Here are some key takeaways on how to do dips at home:
-
Use exercise progressions to help you gradually grow stronger
-
Take long rest between sets for strength, and short rest for conditioning
-
Negative dips are a great way to **build strength
** -
Use assistance bands to help you perform an exercise properly before moving into full bodyweight exercises
-
Take care of your shoulder by rolling and stretching
-
Dips at home can be a fun and engaging way to start your morning
FREE Chest and Triceps Dips Workout (Beginner Level)
| Exercise | Reps | Sets | Tempo | RBS* |
| Band-Assisted Chest Dips | 8 | 3 | 2121 | 2m |
| Dip Negatives | 4 | 3 | 4000 | 90s |
| Deep Chair Pushups | 12 | 3 | 3110 | 90s |
| Feet Elevated Triceps Dip | 12 | 3 | 2121 | 90s |
Enjoy this article? Have questions about one of the exercise progressions? Leave us a comment below - we’d love to hear from you!